Getting started
For convenience, we use the Arduino IDE, but you can use any IDE that supports the ATmega32U4 to upload your code.
1. Install the Arduino IDE
Section titled “1. Install the Arduino IDE”- If you don’t know the Arduino IDE, check out the Using the Arduino Software guide from Arduino itself.
- Download the latest stable Arduino IDE for your operating system.
- Follow the installation guide if needed.
- Open the Arduino IDE.
2. Plug in BYTEBOLT One
Section titled “2. Plug in BYTEBOLT One”Insert the BYTEBOLT One into a free USB 2.0 slot. The host will enumerate it as an Arduino Leonardo (ATmega32U4).
In the top-left corner of the IDE, the board should be auto-detected. Pick the entry that matches your platform:
The board appears as /dev/ttyACM0 (or ttyACMx if you already have other USB-CDC devices attached).
ls /dev/ttyACM*If you get a permission error on upload, your user needs to be in the dialout (Debian/Ubuntu/Fedora) or uucp (Arch) group:
sudo usermod -aG dialout "$USER"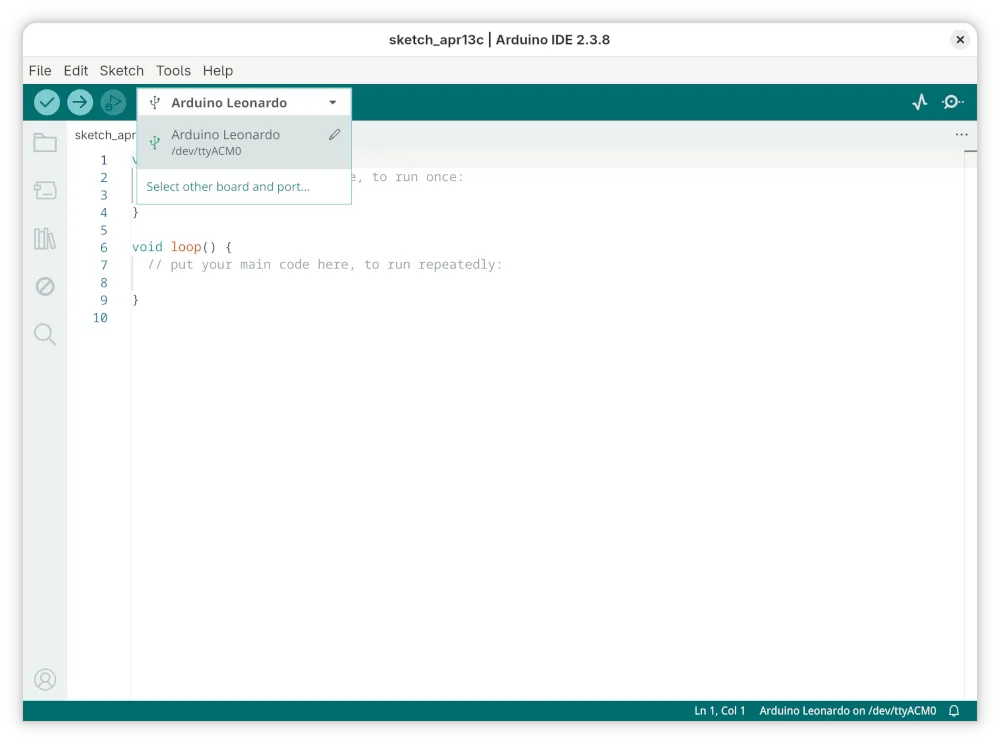
Windows
Section titled “Windows”The board appears as COMx (the exact number depends on what’s already attached). Open Device Manager → Ports (COM & LPT) to confirm. The standard Arduino driver bundled with Arduino IDE 2.x is sufficient — no extra Leonardo driver is required on Windows 10/11.
If the board enumerates but uploads fail, try a different USB port (prefer rear-of-PC USB 2.0 ports over front-panel hubs), and make sure no other application (serial monitor, scripting tool) is holding the port open.
The board appears as /dev/cu.usbmodemXXXX. No driver install is needed on recent macOS versions. On first connection macOS may prompt for permission to access the USB device — allow it.
3. Verify and upload
Section titled “3. Verify and upload”- Select Arduino Leonardo as the board and the matching port from the dropdown.
- Open or write a sketch, then click Verify (compile) followed by Upload.
Tips and hacks
Section titled “Tips and hacks”- Start every sketch with a delay (e.g.
delay(5000);) to give the system enough time for execution and USB enumeration, and to make re-flashing easier. - Use
delay();after every Keyboard command to avoid hiccups. - Don’t forget
Keyboard.end();so the device stops emitting HID reports when the payload is finished.
Troubleshooting
Section titled “Troubleshooting”The board doesn’t appear in the port list
Section titled “The board doesn’t appear in the port list”- Try a different USB port. Front-panel hubs and unpowered hubs are frequent culprits — go straight to a motherboard port.
- Confirm the host enumerates a USB device at all. On Linux:
dmesg | tailshould show a newusbline. On macOS:system_profiler SPUSBDataType | grep -i leonardo. On Windows: Device Manager → “Other devices” or “Ports (COM & LPT)”. - If the board is stuck running a previous payload (e.g. it keeps typing into your IDE), use the re-plug timing recovery described below.
Upload fails with “no device” or timeout
Section titled “Upload fails with “no device” or timeout”The ATmega32U4 only exposes the bootloader for a short window (~8 s) after power-up or reset. If your sketch is running immediately on power-up (no delay() at the top), the upload window can close before the IDE finishes compiling.
BYTEBOLT One is intentionally minimal — bare ATmega32U4 and a USB connector, no reset button and no exposed reset pads — so the only way to re-enter the bootloader is to power-cycle the board by unplugging and re-plugging it.
Re-plug timing recovery: Click Upload in the IDE first, then wait until you see “Uploading…” in the status bar. Immediately unplug the board and plug it back in. The bootloader window opens on the fresh enumeration, and the IDE pushes the new sketch into it. It may take a couple of attempts to get the timing right.
To avoid this in the future, always start your setup() with delay(5000); (or longer) before any Keyboard.begin() / payload code — that leaves a guaranteed window for re-flashing without the timing dance.
The payload runs but types the wrong characters
Section titled “The payload runs but types the wrong characters”You are almost certainly on a different keyboard layout than the sketch assumes. Pass the matching layout to Keyboard.begin() — for example Keyboard.begin(KeyboardLayout_de_DE); for a German host. See Keyboard Layouts for the full list.
Permission denied on /dev/ttyACM0 (Linux)
Section titled “Permission denied on /dev/ttyACM0 (Linux)”Add your user to the dialout group (Debian/Ubuntu/Fedora) or uucp (Arch), then log out and back in. See the Linux section above.